
Do it yourself projects are increasingly popular, and solar panel installation is no exception. If this is something you’re interested in, though, you need to know more than simply how to install solar panels. You need to make sure you have the right permits, materials, number of panels, and more.
To get you started, this solar panels installation guide walks you through all the components you need to consider, so you can be confident you’re not missing anything.
Location and Initial Inspection
The first step of the installation of your solar system is deciding where to put it. Depending on your situation, you could go with roof-mounted panels or a ground-mounted solar array.
With roof-top panels, you need to make sure the roof can support the weight of the panels. If you’re not sure, a structural engineer may need to inspect the roof.
With ground-mounted arrays, you’ll need to confirm the type of soil and how much room it needs to support the mount. Sandy soil will need more space than rocky soil, for example.
In either situation, you may want to get an electrical inspection to be sure your wiring is up to code. If you have any doubts about your situation, contact your local building department.
Energy Usage and System Size
The next phase is calculating how much energy you use. This will tell you how big your system should be.
The best option is to use an online solar calculator to give you an estimate. Many solar providers offer them, or you can do a quick search and find one that works for you.
Permits
Before you can move ahead with your solar installation, you still need to apply for permits.
Depending on where you live, you may need a building permit, an electrical permit, or both. Look for your local permitting department or agency to get started on this.
You’ll also need to contact your utility provider about a permit for connecting your solar panels to the grid. This is a good opportunity to check if you’ll be able to take advantage of net metering, a process that lets you sell any excess power back to the utility.
Once you have the permits in-hand, you can proceed with choosing your solar equipment.
Select Solar Equipment
A solar panel system includes more than the panels. When purchasing your solar equipment, you’ll need:
- Solar panels
- Inverter
- Batteries
- Charge converter
Solar Panels
Solar panels come in two categories, monocrystalline and polycrystalline. Monocrystalline panels are smaller and more efficient than polycrystalline, but they also cost more.
Within the categories, you’ll also want to consider the quality of the manufacturer. While solar panels are generally durable, they still degrade over time. Find out what guarantees the manufacturer offers and if they have any customers in a situation similar to yours.
The goal is to find the best option for your budget, location, and energy production needs.
Inverter
Solar panels produce energy in the form of direct current (DC), but the electricity in your house uses alternating current (AC). To convert DC to AC, you’ll need an inverter.
Inverters are classified by the type of output they produce: sine wave, modified sine wave, and square wave.
The most efficient of these is the sine wave since this type of energy can be used by any appliance. This is also the more expensive option, so you might want a modified sine wave inverter. It’s important to note that not all appliances work with a modified sine wave inverter, and ones that do will operate at lower efficiency.
Square wave inverters are the least expensive, but many appliances won’t work with them, so they’re not commonly used.
Additionally, you’ll need to decide if you want a stand-alone inverter or a grid-tie inverter. Stand-alone inverters work with a battery backup, which makes them ideal for going off-grid. Grid-tie inverters require connection to the utility grid to function, and they go offline in a power outage.
Finally, get an inverter that supports your power requirements. Find one with a power rating that matches or exceeds the maximum load you might experience at any time. Bear in mind that some appliances take more energy to start up than to run, so you should factor that in.
Select Batteries
Even if you’re not going off the grid, batteries are a good idea. They allow you to store extra solar energy that you can use overnight or if you lose power.
Lead-acid batteries are often a good fit for solar backup since they allow for partial discharge and deep discharge. Lithium-ion batteries can also be a good fit. Consider the price as well as the capabilities when making your decision.
You also need to make sure you have enough battery storage for your needs. Estimate how many hours you’d expect to use the battery, and how many watts it needs to provide. Include a buffer as well, so you don’t run out of power at the worst time.
Select Charge Controller
Finally, you’ll need a solar charge converter. This regulates the power coming from the solar panels so you have the proper voltage for charging your batteries. When the solar panels produce more energy, the controller prevents the battery from over-charging.
You can choose a Pulse Width Modulation (PWM) or Maximum Power Point Tracking (MPPT) controller. MPPT controllers are the most effective, but they are also larger and cost more. Based on your budget and size restrictions, you may decide that a PWM controller is the best choice.
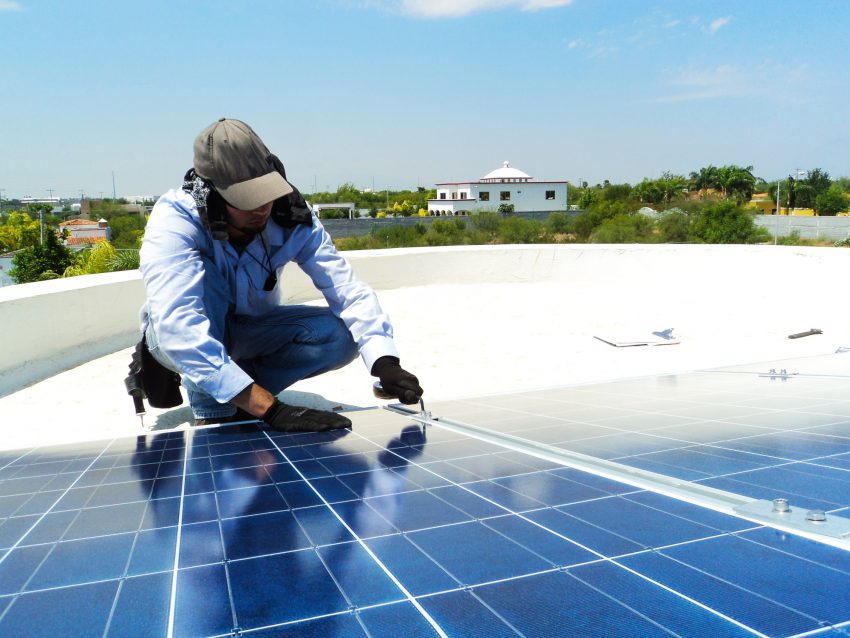
Installation
Once you have all your equipment in place, it’s time for installing solar panels!
For roof-top panels, you’ll need to first install the necessary brackets and rails. You may also want an extra set of hands to help, depending on your roof configuration.
For a solar array, you’ll need a mounting stand that you can purchase or build yourself. Make sure to position it and tilt the stand so you’ll get the most sunlight. Once your stand is ready, put the panels onto the mount.
Then you can install the inverter and batteries. Depending on the size of the batteries and where you’ll put them, you might want to have a stand.
Wiring
Finally, it’s time to wire everything together.
Even if you’ve done everything else yourself, this is one area where you may want to consider getting outside help. A common mistake with home projects is not recognizing your limits. If you’ve never done electrical work before, this probably isn’t the place to start.
Whether you’re doing the wiring or getting help, be sure that you’re connecting negative with negative, and positive with positive. You’ll also want to have each element included, with the panels, inverter, batteries, and controller all working together.
Final Inspection
The last thing you need to do is get an inspection to confirm that you meet all the local ordinances. You may need to make a few corrections in order to pass the inspection, but once you do, you can finally flip the switch.
The only caveat is if you’ll be connected to the grid. If so, you’ll need someone from the utility company to do one more evaluation of your solar panel before connecting to the grid. Once they give the okay, you’ll be live.
Congratulations on Your Solar Panel Installation
You’ve now successfully completed your solar panel installation – congratulations! This is a good move for your electricity bills, and for the planet. Now you can sit back and enjoy your energy independence.
Need any help with part of your project? See if any of our engineers are a good fit.